Building a web application with AngularJS - Part 2
As a follow-up on my previous post, I wanted to go into further detail on how the Angular application was built; right from the ground up.
If you haven't read Part 1, I recommend giving that a browse, as it gives some background into what I'm about to discuss. Or if you'd like, check out the complete codebase on Github.
Although just a quick recap, the application is called MuHub and it's an online student tool for Maynooth University students. The application originated from a designated group project as part of one of my university modules.
In my previous blog post I mostly stuck to discussing the project workflow, source control methods and the overall development environment we built around the application.
However in this post I wanted to delve deeper into the application's inner-workings and explain how this thing got off the ground!
AngularJS & Angular Material
If you haven't already guessed from the title, this app is built around AngularJS v1 and leverages the Angular Material Framework.
The Angular Material Framework was chosen because it could provide many of the convenient UI components for building the interface, freeing attention to focus on the functionality alone.
What results is a beautiful, responsive application that conforms to Google's Material Design Specifications.
Importing Angular Material was just a matter of npm install angular-material and adding it as the ngMaterial dependency.
angular
.module('app', ['ngMaterial','ui.router', 'main', 'firebase', 'ngMap', 'ngSanitize'])
It's fair to say the Material Framework was used extensively throughout the application!
Unfortunately it's still in development for Angular v2, hence why we stuck with Angular v1. We figured working with tools that are still under active development could potentially lead to trouble. The sort of trouble that only rears its head halfway through development...
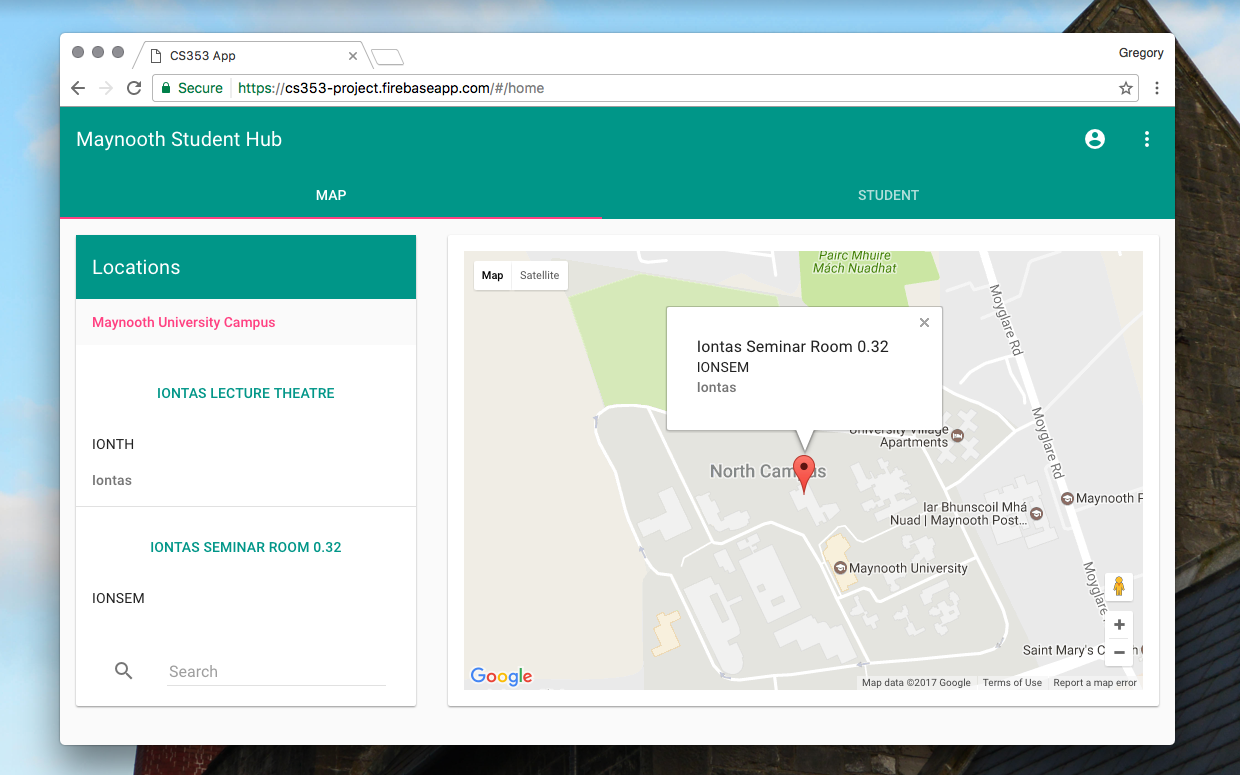
The above image is the landing page for the application upon login. Immediately one can discern that we chose a card-based layout with tab navigation - a very typical Material UI design.
The Angular Material framework provides the necessary directives for building this interface responsively - through the use of unique md-grid-list, md-grid-tile and md-card tags.
For those familiar with flexbox in CSS, grids with Angular Material are almost the exact same.
This is just a minor insight into Angular Material, but I'll touch upon it more once I get into more detail on things.
Firebase
![]()
Firebase was chosen as the backend database for the application. It was my first experience with a non-relational database based on JSON but I slowly built up speed with it.
I was surprised how seamlessly Firebase integrated with the app and how quick it was to get setup. The Firebase CLI is well worth a mention too. It allows you to manage, view, update and deploy from the shell with ease.
Like most things, it's installed with npm install -g firebase-tools.
Simple commands such as firebase init would generate the necessary .firebaserc, firebase.json and database.rules.json files for your project.
Then with the project intialised, you can get going with firebase serve to throw up a local server or even firebase deploy to deploy remotely on Firebase servers.
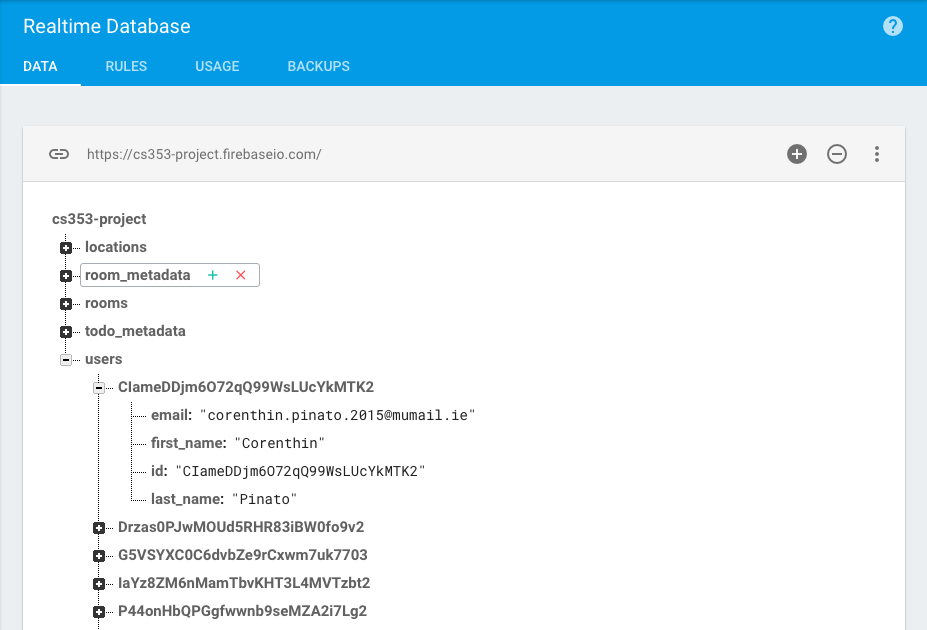
Above you can get an idea about how data is structured in a hierarchical way as a tree of JSON objects. Unlike say, a SQL database, there's no tables or columns in sight!
This was a complete flip on what I knew about databases so I had to change my thinking pattern when it came to Firebase. For one, I had to learn best practices when it came to structuring my data in a non-relational manner.
For example, I soon ran up against the issue of repeatedly nesting data down a rabbit-hole of nodes. This is a bad idea because when Firebase fetches the data at the specified location, it will also retrieve all of its child nodes. Not great in terms of efficiency then.
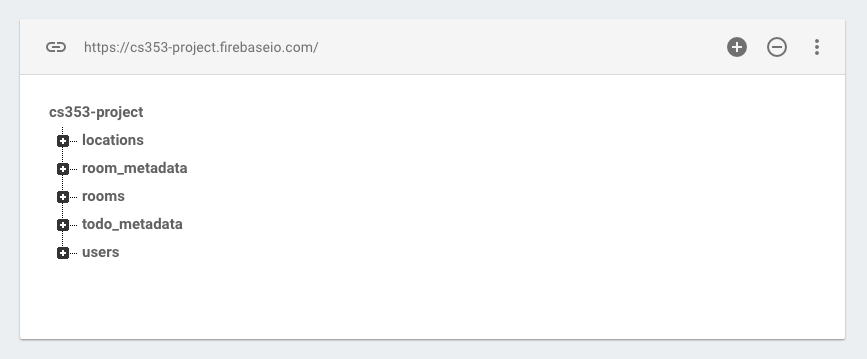
To counter this, I kept the data structure as flat as possible (denormalisation) in order to avoid constantly iterating down, through node and node. See the image above for context.
AngularFire
But now with Firebase setup - how do you interrograte the database and take advantage of Firebase's features through AngularJS? The answer is AngularFire.
AngularFire is the binding Firebase has for AngularJS. It provides several Angular services that open up some useful Firebase functions, including but not limited to:
| Service | Description |
|---|---|
$firebaseObject |
synchronised objects |
$firebaseArray |
synchronised collections |
$firebaseStorage |
store and retrieve user-generated content like images, audio, and video |
$firebaseAuth |
authentication, user management, routing |
With tools like these, you can enable true three-way data binding between the DOM, your Angular logic and the Firebase backend.
You can add it as a script or simply install with NPM using npm install angularfire --save
I used AngularFire extensively throughout the application and I even created two short & useful factory methods to call the FireBase Authentication and Database services, Auth and Data respectfully.
/* Angular Firebase Services */

.factory('Auth', ["$firebaseAuth", function($firebaseAuth) { return $firebaseAuth(); }])
.factory("Data", function() { return firebase.database().ref(); })
For instance, in my Angular controller code I could then call on these custom factory methods to provide the necessary Firebase methods I needed.
For example, I often needed to get the current user's unique identifier (UID) for validation.
I could do this in a single line with:
$scope.current_user_id = Auth.$getAuth().uid;Or similarly, I could use Data to pick up on the child node called users in my Firebase database. Now with the current user's UID I found with Auth I can target that user's data contained in the users node.
Data.child('users').child($scope.current_user_id).once('value', function(item) ...Putting it all together, I can write a few lines of code to gather all the users in my data minus the current user. I can then use this example for displaying all the contactable users the current user has access to. Since it wouldn't make sense to be able to contact yourself, I remove the current user from the list.
var room_list = $firebaseArray(Data.child('users'));

$scope.current_user_id = Auth.$getAuth().uid;
$scope.users = [];

// remove current user from list; for display purposes only

room_list.$loaded()
    .then(function() {
    angular.forEach(room_list, isCurrentUser);
});

var isCurrentUser = function (user, uid) {
    uid = $scope.current_user_id;
    if (user.id != uid) {
        $scope.users.push(user);
    }
}
As you can see in the example above, I use the $firebaseArray service to get an array of data from the users node.
I use the $loaded promise to wait until the data is loaded to take action. I then iterate over the $firebaseArray and execute the callback function isCurrentUser to check for a matching UID in the database.
Until I find a matching UID I continue to push each non-matching user into my $scope.users array. Pretty straightforward and super useful.
Angular UI Router
Another package I installed via NPM was Angular UI Router (which is akin to ngRoute). It's an add-on routing SPA (single page application) framework which allows users to navigate the application.
Using UI-Router, I could restrict and extend access to each of the application's views based on user privileges. So rather than changing your application views based on simply the route URL, it's based on the state of the application instead.
$stateProvider
    .state('home', {
        url: '/home',
        views: {
            'dash_toolbar': {
            templateUrl: 'app/views/dash_toolbar.html',
            controller: 'dash_toolbar_controller',
            controllerAs: 'dt'
        },
        'dashboard': {
            templateUrl: 'app/views/dashboard.html',
            controller: 'dashboard_controller',
            controllerAs: 'dc'
        }
    },
    resolve: {
        currentAuth: ['Auth', function(Auth) {
            return Auth.$requireSignIn()
        }]
    },
})
In the above example you can see I have my home state with resolve further down. Inside home I have my different views listed with associated controllers.
However, in order to access home the user must first be validated, hence the resolve functionality which requires user to sign in beforehand.
<body ng-app="app">
    <div class="container">
        <div ui-view></div>
        <div ui-view="dash_toolbar"></div>
        <div ui-view="dashboard"></div>
    </div>
</body>
With UI-Router I can condense the different views down into a mere three divs for the login, dash_toolbar and finally, the dashboard.
NgMaps
The landing page for the application is the dashboard which is dominated by an embedded Google Map. This map is set to display the Maynooth University campus by default. To the left-hand side of the map is a list containing the number of locations on campus.
The search bar at the bottom of the list will also filter through the locations to display the location relevant to the query.
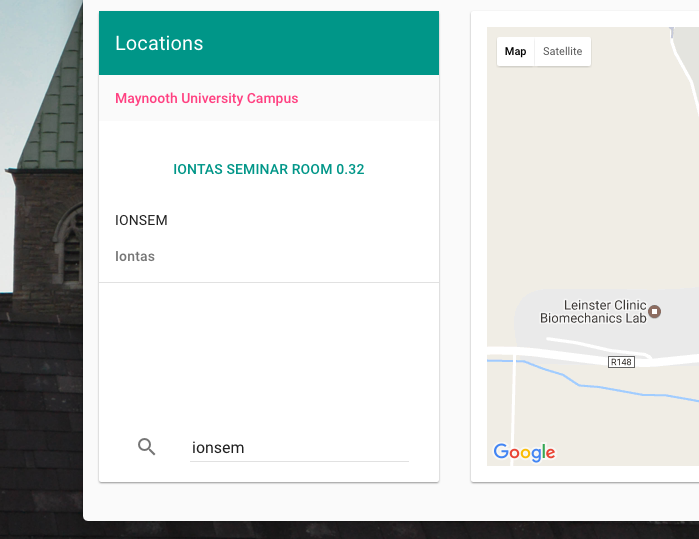
The map functionality is handled by NgMaps which is a special directive injected into the Angular app as a dependency.
In the dashboard.html view you can see the center I've set for the map as well as the level of zoom.
<md-card-content flex>
    <ng-map center="[53.383,-6.602]" layout-fill zoom="16">
        <marker id="marker" position="{{location.coords.lat}},{{location.coords.lng}}"></marker>
        <info-window id="info">
            <md-list flex>
                <md-list-item class="md-3-line">
                    <div class="md-list-item-text" ng-non-bindable="">
                        <h3>{{location.room_name}}</h3>
                        <h4>{{location.room_code}}</h4>
                        <p>{{location.building}}</p>
                    </div>
                </md-list-item>
            </md-list>
        </info-window>
    </ng-map>
</md-card-content>
The <marker></marker tag is generated when a location in the list is clicked. Its position (longitude and latitude) is provided by the Angular expression: {{location.coords.lat}},{{location.coords.lng}}.
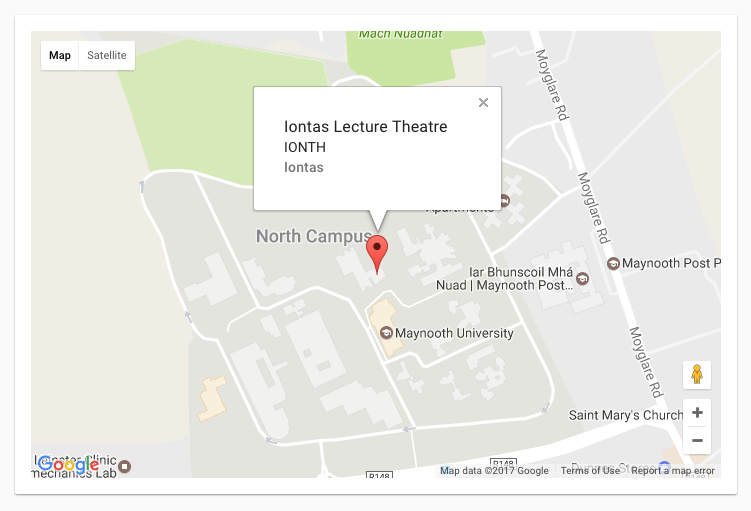
And then, when the marker is displayed on the map, an info window appears above the marker showing the location's info. That data is again imparted from the Angular controller.
Going to the Angular controller then, I've created a dedicated function that takes NgMap as a parameter as well as $firebaseArray and Data like we've seen before.
The map is setup with .getMap() and the locations are pulled from Firebase using the AngularFire services I mentioned earlier.
The addMarker function I've defined takes a location from the list as its parameter item. Then item is, in turn, assigned to the scope variable location which is provided to the DOM.
Finally the map is re-centered and panned to the new location.
function map($scope, NgMap, $firebaseArray, Data) {

    NgMap.getMap().then(function(map) {
        $scope.map = map;
    });

    // pull location data from firebase
    $scope.locations = $firebaseArray(Data.child('locations'));

    $scope.addMarker = function(item) {

        // display marker and info window
        $scope.location = item;
        $scope.map.showInfoWindow('info', 'marker');

        // dynamic map re-centering
        var coords = new google.maps.LatLng(item.coords.lat, item.coords.lng);
        $scope.map.panTo(coords);
    }
};
For quite a short and simplistic piece of code I feel it works pretty great. It's perfectly succinct and expressive, demonstrating how satisfying it is using AngularFire with AngularJS.
Features
The application has many more features than I have time to discuss in depth, but I'll quickly run through everything worth mentioning.
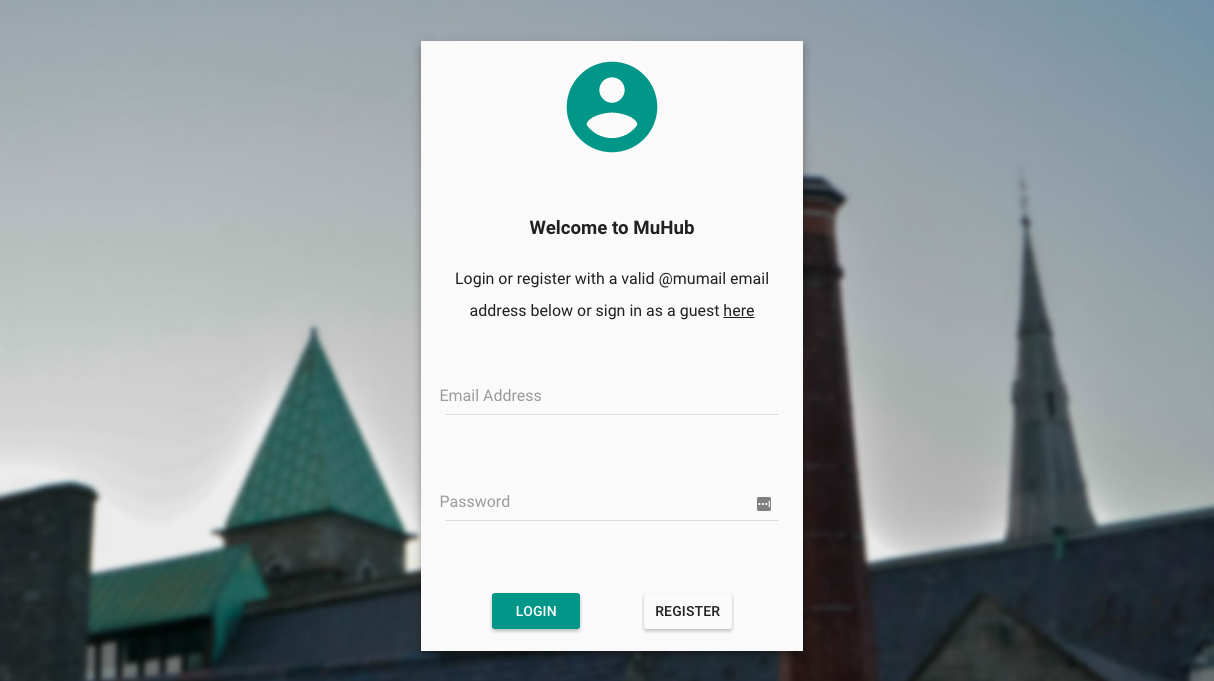
Login
The login page is the first page the user views upon launching the application. The user, if already registered may sign in. Otherwise they can register, which requires email address verification before their account can be validated.
An additional feature I added to allow anyone to view the app was to include a Guest login that didn't require the user to be registered.
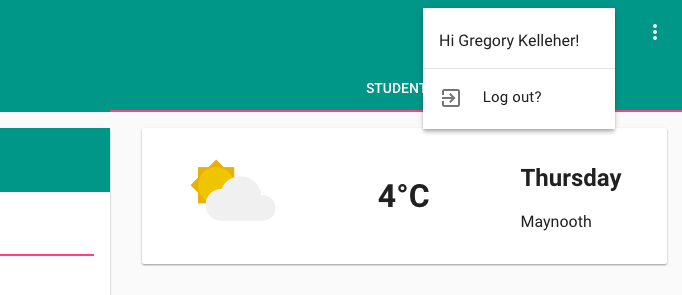
Once the user is logged in, their name is also displayed in the upper menu alongside the option of signing out.
//logout user on btn

$scope.logout = function() {
    firebase.auth().signOut().then(function() {
        $state.go('login');
        toast.display("You've been logged out")
    }, function(error) {
        toast.display("Your log out was attempted", error);
    });
};
In the snippet of code above you can see that I'm using firebase.auth().signOut() to sign the current user out. UI-Router like I've shown before, handles the state change and brings the user back to the login page. I've also made a handy toast factory to display a message to the user.
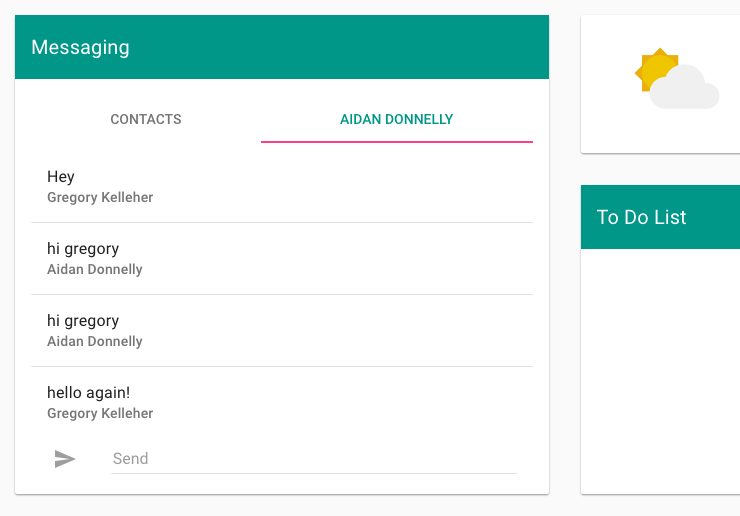
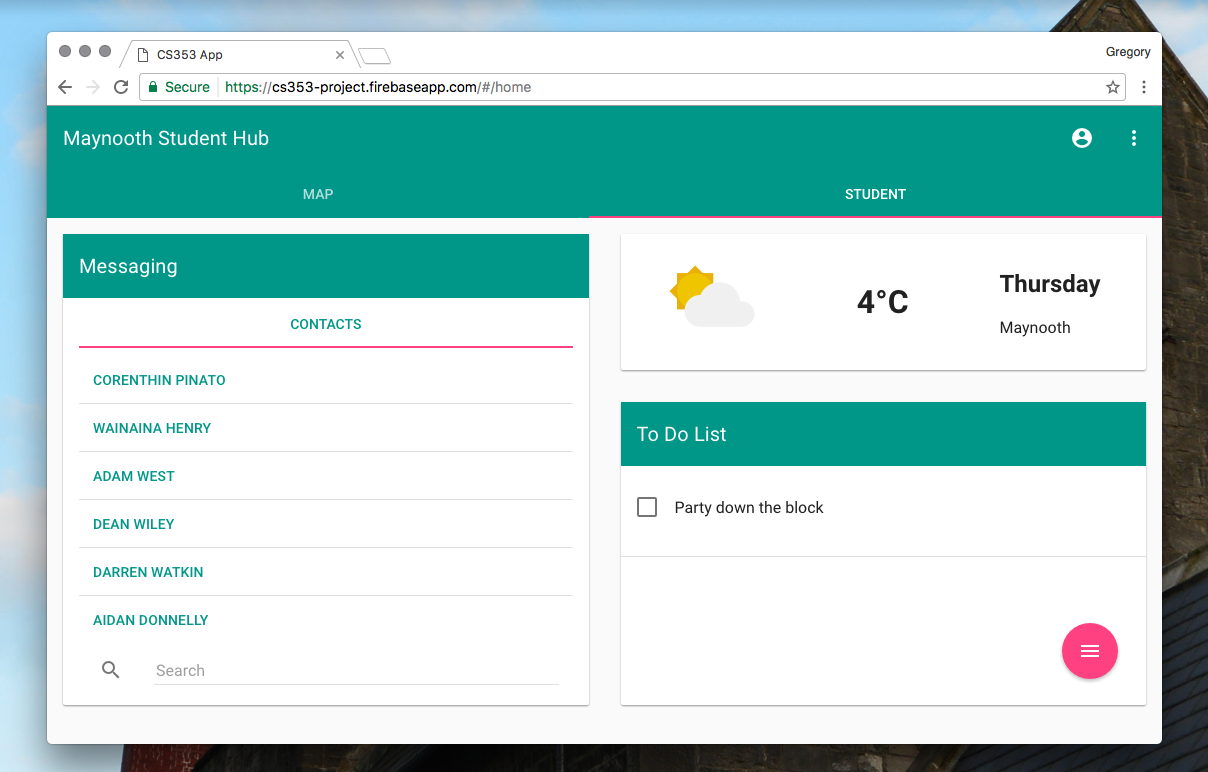
Messaging
Possibly the most complex feature was developing the messaging feature. The aim was to enable registered users to send and receive messages to each other.
In hindsight, it would have been useful having used something like FireChat to build this feature, but it ended up being built from scratch.
It works and messages are updated and sent in real-time. Perhaps there's a better way but it's still impressive having built it from the ground up. All the data is held in Firebase of course.

Lastly, when I added the guest feature I wanted to disallow guests from being able to message registered users. Without being registered, a prompt dialog appears for the user.
To-Do List
Another feature I worked on was integrating a to-do list where users could add and delete reminders. it's fairly simplistic of course but it ties in quite well.
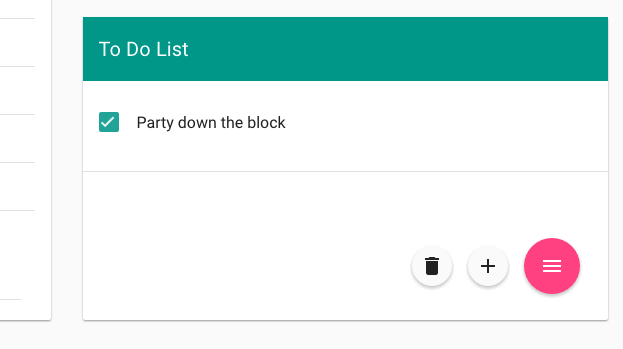
In the lower right-hand corner there's a fab button which displays actions upon hover. For instance, only if a list item is selected will the bin icon appear in the menu.
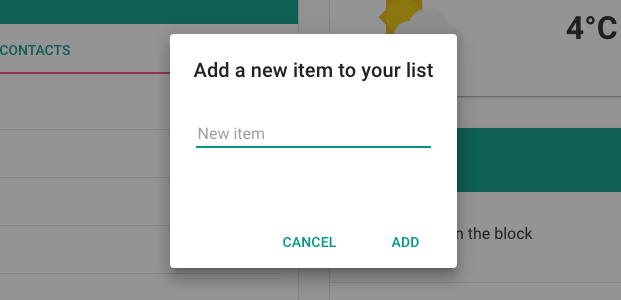
Adding new items is also handled with a prompt dialog provided by the Angular Material framework.
Weather
Finally there's the weather card. It displays up-to-date weather data using the Apixu API. Believe it or not, I had to try several weather APIs before settling on Apixu.
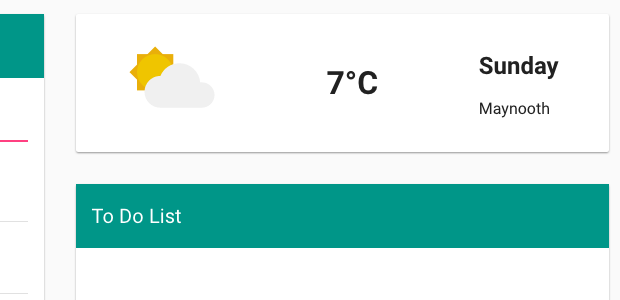
Many API's are served over HTTP rather than HTTPS and Angular doesn't particulary like 'mixed content' as I found, refusing to serve. Therefore I had quite a bit of hassle finding a suitable API until Apixu.
Conclusion
This application serves as one of my very first forays into AngularJS and I've been pleasantly surprised. Albeit this is AngularJS v1, I still feel very confident progressing onto Angular v2.
For a first attempt, having a functioning example that successfully includes multiple packages is quite deserving and I feel a bit proud. Choosing to use AngularFire and the Angular Material framework were great decisions and made things much easier to work with when it came to Firebase and the like.
On that note, it was a first for everything really. I had very little experience with any of the tools I began with, and maybe that shows in my code! There's certainly things I'd like to go back on and improve if I had time.
I look forward to improving on my newly learnt skills and I'm definitely enjoying this new line of coding. Hopefully I'd like to better my JavaScript coding and move into TypeScript (with AngularJS v2) or maybe React JS. Whatever's ahead, I'm already looking forward to it!